Tutorial: Creating Postmarks with PhotoShop Elements
Quote from Steve on June 17, 2023, 12:35 pmPHOTOSHOP ELEMENTS POSTMARK TUTORIAL 10/10
10]. Postmark and Text Recreation by Other Means.
This is a simpler way to capture postmarks but it does not always work very well. At the risk of those of you who have laboured through this tutorial swearing mightily at me, here is an alternative way to recreate postmarks.
This should also work in other graphics programs that offer Layers and a Paint Bucket Tool. If you have attempted this tutorial you will have acquired the skills needed to do this. It is quicker, possibly more accurate but can also be more problematic depending on the nature of the scanned image. It does not always give you a good looking result and often requires tidying up. However, in the case of our sample image it works quite well.
Essentially, we are going to drop Black into selected areas of the image (the postmark) using the Paint Bucket Tool. Once we have recreated the postmark in a single, sold, unanimous Black, we will remove the Backround colours through a variety of means.
1]. Open the 600 dpi sample image and create a Background copy and a working Layer 1.
2]. Ensure that you are working on the Background Copy Layer.
3]. Ensure that the colour Black is the selected Pen colour.
4]. . Click on the Paint Bucket Tool icon. Ensure that Contiguous is not checked.
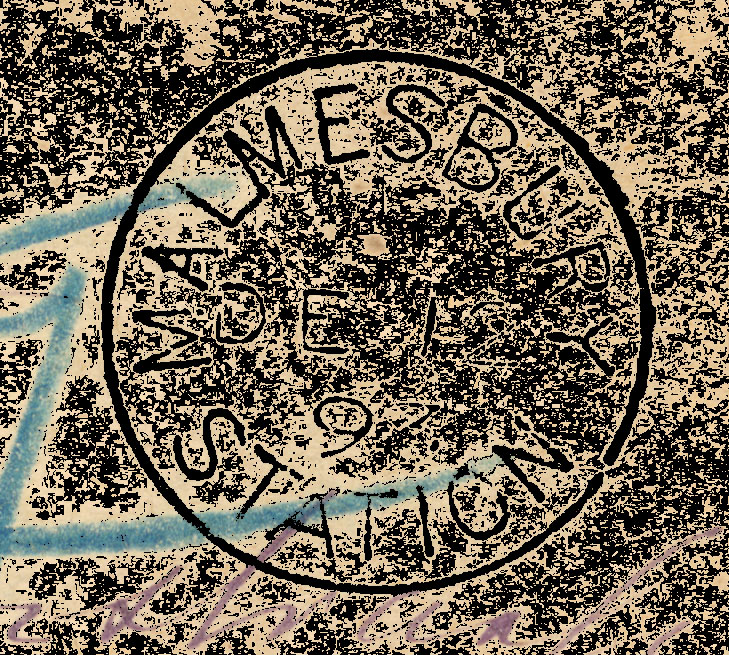
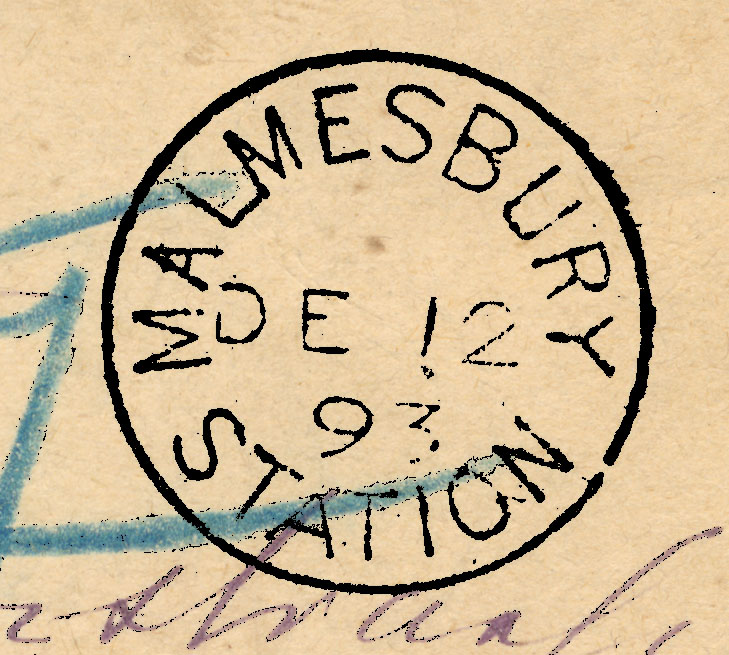
The plan is to drop Black paint into the area of grey postmark. See topmost image. Do NOT drop it into the buff brown background or the blue Registration mark. This may take some time as there are 16.7m colours in a 24 bit image. Fortunately, we are only going to have to deal with shades of grey. (More than 50!). And fortunately, again, when you drop Black into a pixel, all other pixels of the same colour will be made Black. If you select the wrong colour, this will cause a problem. Use Undo to clear your mistakes. See third image.
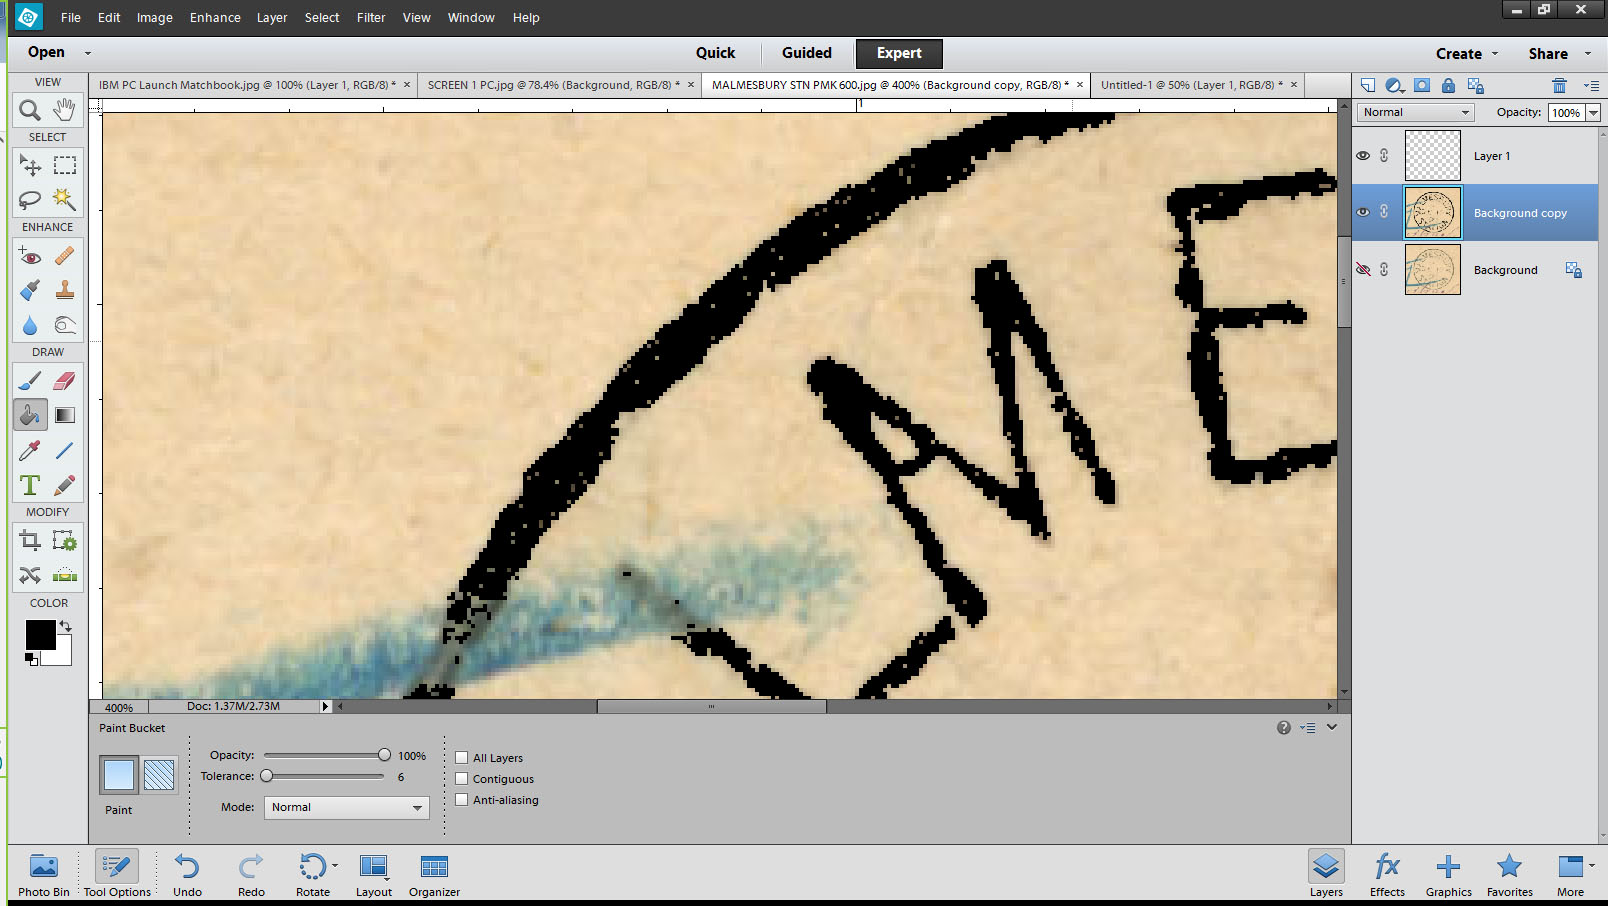
This image is pretty forgiving and will let you drop black into blue Registration and violett handwriting where the dominant shade of colour is grey. So, carrying on dropping Black until the postmark is almost solid. If you Zoom in, be aware that you could be painting part of the image that you cannot see because of the zoom magnification. You should be left with something like the image at the bottom. Now, all we have to do is extract the black postmark.
PHOTOSHOP ELEMENTS POSTMARK TUTORIAL 10/10
10]. Postmark and Text Recreation by Other Means.
This is a simpler way to capture postmarks but it does not always work very well. At the risk of those of you who have laboured through this tutorial swearing mightily at me, here is an alternative way to recreate postmarks.
This should also work in other graphics programs that offer Layers and a Paint Bucket Tool. If you have attempted this tutorial you will have acquired the skills needed to do this. It is quicker, possibly more accurate but can also be more problematic depending on the nature of the scanned image. It does not always give you a good looking result and often requires tidying up. However, in the case of our sample image it works quite well.
Essentially, we are going to drop Black into selected areas of the image (the postmark) using the Paint Bucket Tool. Once we have recreated the postmark in a single, sold, unanimous Black, we will remove the Backround colours through a variety of means.
1]. Open the 600 dpi sample image and create a Background copy and a working Layer 1.
2]. Ensure that you are working on the Background Copy Layer.
3]. Ensure that the colour Black is the selected Pen colour.
4]. . Click on the Paint Bucket Tool icon. Ensure that Contiguous is not checked.
The plan is to drop Black paint into the area of grey postmark. See topmost image. Do NOT drop it into the buff brown background or the blue Registration mark. This may take some time as there are 16.7m colours in a 24 bit image. Fortunately, we are only going to have to deal with shades of grey. (More than 50!). And fortunately, again, when you drop Black into a pixel, all other pixels of the same colour will be made Black. If you select the wrong colour, this will cause a problem. Use Undo to clear your mistakes. See third image.
This image is pretty forgiving and will let you drop black into blue Registration and violett handwriting where the dominant shade of colour is grey. So, carrying on dropping Black until the postmark is almost solid. If you Zoom in, be aware that you could be painting part of the image that you cannot see because of the zoom magnification. You should be left with something like the image at the bottom. Now, all we have to do is extract the black postmark.
Uploaded files: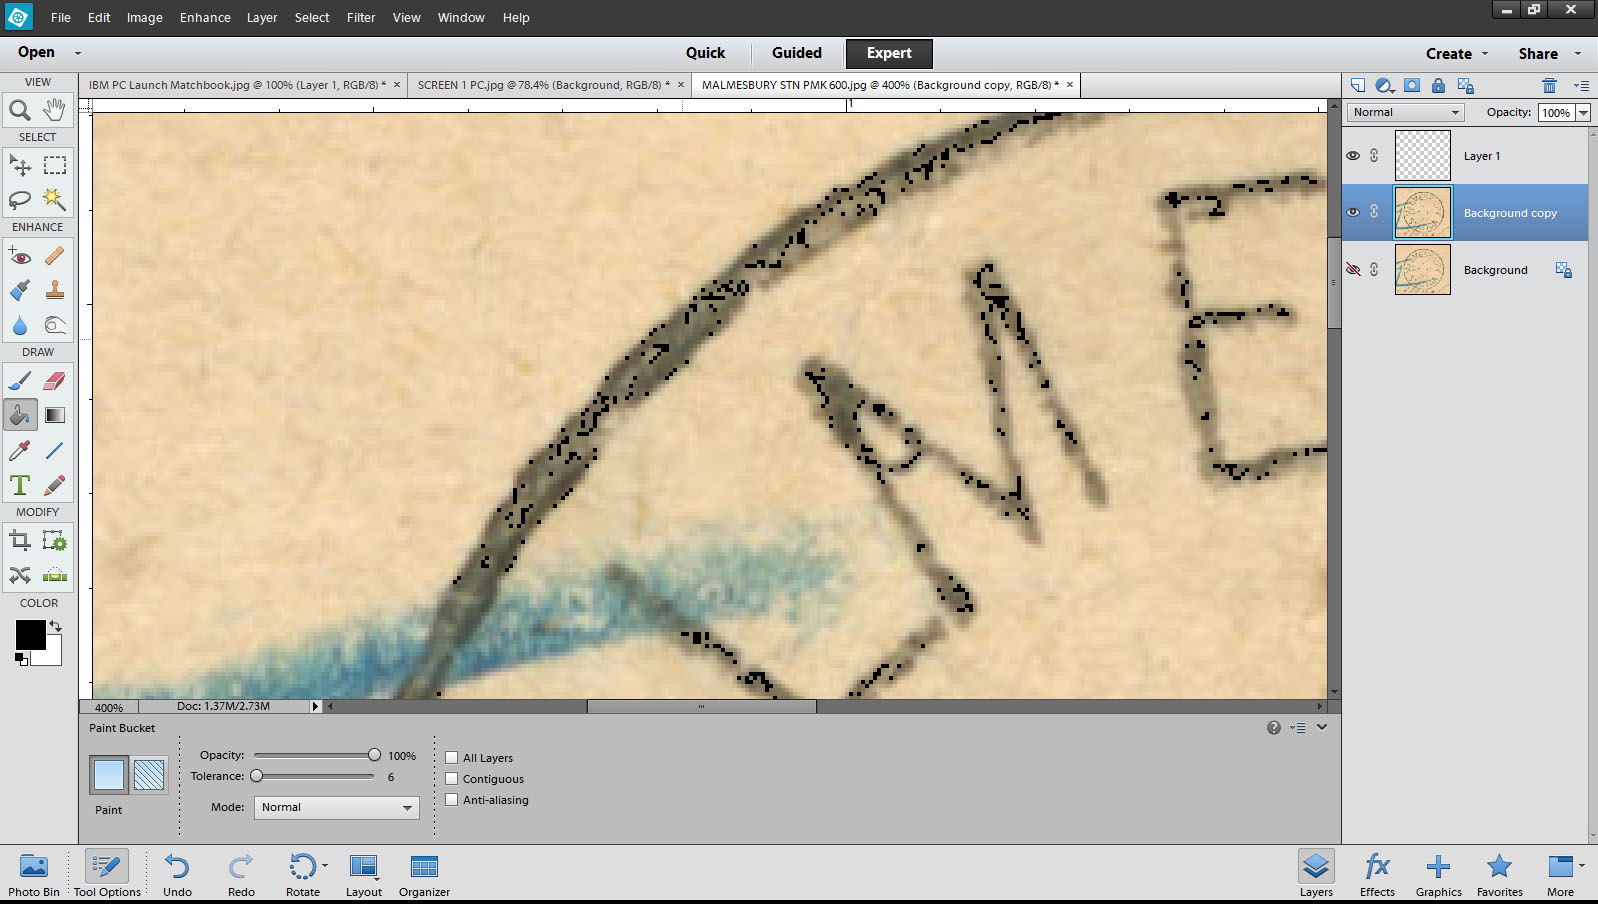
Quote from Steve on June 17, 2023, 12:38 pmPHOTOSHOP ELEMENTS POSTMARK TUTORIAL 11/11
11]. Last but not least.
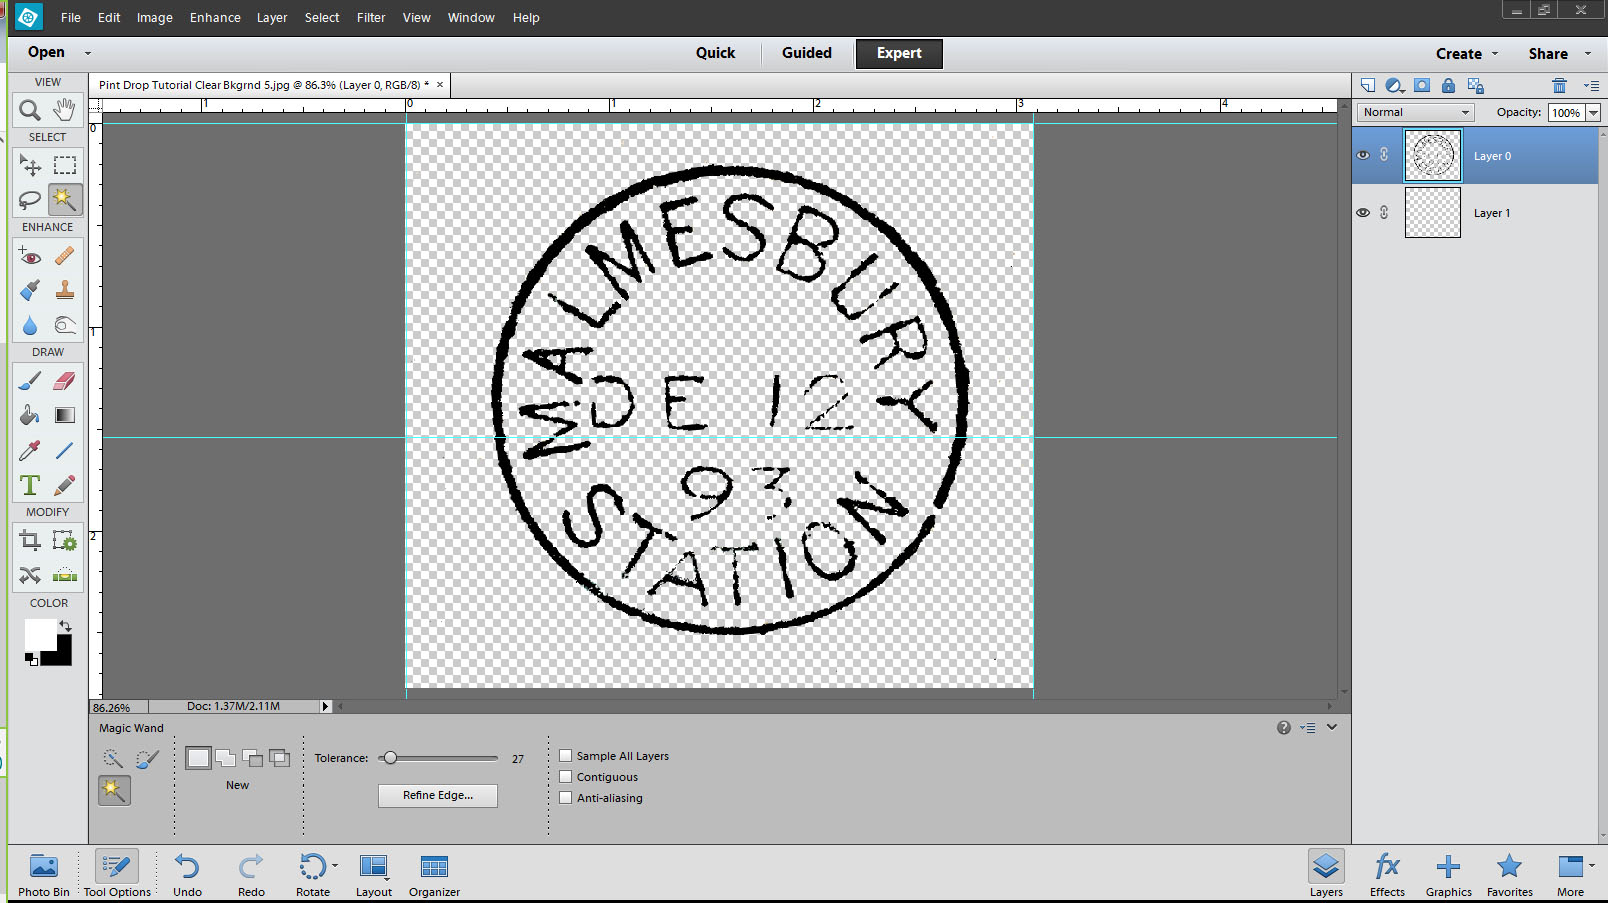
To remove non-Black colour and to be left with only the Black postmark outline we will use the Magic Wand tool (with yellow star) on the right side of the Lasso Tool, top left.
Click the Magic Wand anywhere that is not Black. Parts of the image are highlighted. Press Delete to clear them.
Continue doing this until the Background is largely clear and mostly White. Be careful not to click on Black areas. If you do, use Undo.
Now, we will clean up the remaining spotty areas using a White pencil.
Select White in COLOR bottom left. You can change the size of the Pencil in Size at bottom left or by using the square brackets '[' or ']' to make the pencil size smaller / bigger.
Finally, place your transparent Layer 1 below Background copy.
Click on the White backround with Magic Wand tool (with yellow star) to delete it.
You are left with a black postmark against a transparent background. This makes it ideal for superimposing over other images in Photoshop. If you export the files to another graphics program the background may come in as White. In that case, you will have to use the tools supplied in the host graphics program to delete the background to make it transparent again.
At this point you can edit the image should you want to do so. I did some very minor editing on it, the most intrusive was to delete the tip of the foot of the 'L' from touching the left leg of the 'M'. I was tempted to trace over the text to tighten it up but in the interests of accuracy decided to leave it as is. Generally speaking, this is a more accurate reproduction than where we traced over the text. However, for a variety of reasons this method does not always work. Much depends on the quality of the scanned image which is often variable.
PHOTOSHOP ELEMENTS POSTMARK TUTORIAL 11/11
11]. Last but not least.
To remove non-Black colour and to be left with only the Black postmark outline we will use the Magic Wand tool (with yellow star) on the right side of the Lasso Tool, top left.
Click the Magic Wand anywhere that is not Black. Parts of the image are highlighted. Press Delete to clear them.
Continue doing this until the Background is largely clear and mostly White. Be careful not to click on Black areas. If you do, use Undo.
Now, we will clean up the remaining spotty areas using a White pencil.
Select White in COLOR bottom left. You can change the size of the Pencil in Size at bottom left or by using the square brackets '[' or ']' to make the pencil size smaller / bigger.
Finally, place your transparent Layer 1 below Background copy.
Click on the White backround with Magic Wand tool (with yellow star) to delete it.
You are left with a black postmark against a transparent background. This makes it ideal for superimposing over other images in Photoshop. If you export the files to another graphics program the background may come in as White. In that case, you will have to use the tools supplied in the host graphics program to delete the background to make it transparent again.
At this point you can edit the image should you want to do so. I did some very minor editing on it, the most intrusive was to delete the tip of the foot of the 'L' from touching the left leg of the 'M'. I was tempted to trace over the text to tighten it up but in the interests of accuracy decided to leave it as is. Generally speaking, this is a more accurate reproduction than where we traced over the text. However, for a variety of reasons this method does not always work. Much depends on the quality of the scanned image which is often variable.
Uploaded files: